Audit a file or a folder
You can define the paths to monitor in FileAudit, using the “Add a path” button in the “Windows servers” or “Windows paths” pages.
The audit configuration is performed by a wizard using automatically selected parameters.
- Click on “Add a path” in the “Windows servers” or “Windows paths” pages.
- In the “Audit a path” popup, Click on the “Browse” button to select the “File” or “Folder” you wish to audit.
-
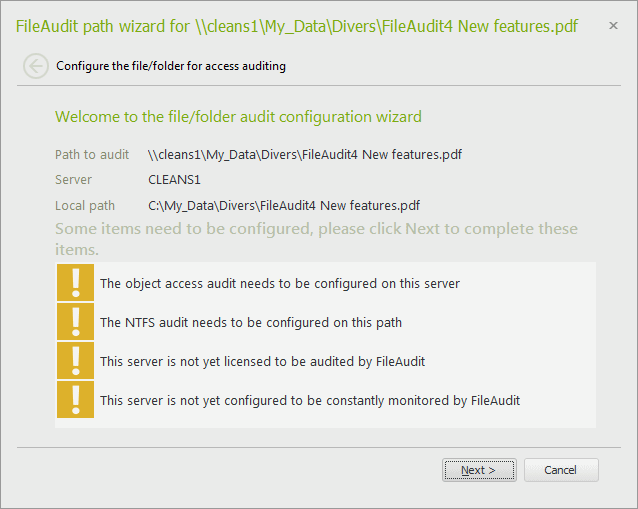
Having validated your selection, the ‘FileAudit path wizard’ will pop up and guide you through the process of configuring the file audit.
This wizard will display the status of the Audit configuration for the selected file and highlight any missing requirements or settings. For each necessary action, you have the choice of completing it automatically (via the wizard) or manually. We strongly recommend that FileAudit automatic configuration be used for all audit settings.
List of required actions:
-
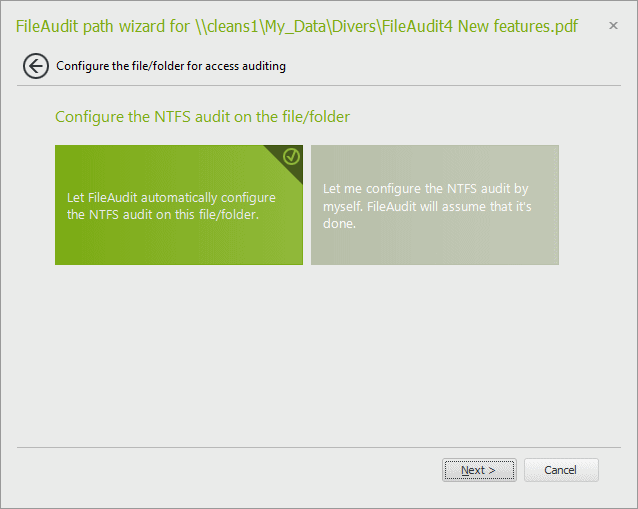
Set automatic or manual processing.
-
FileAudit will optimize NTFS audit settings:
-
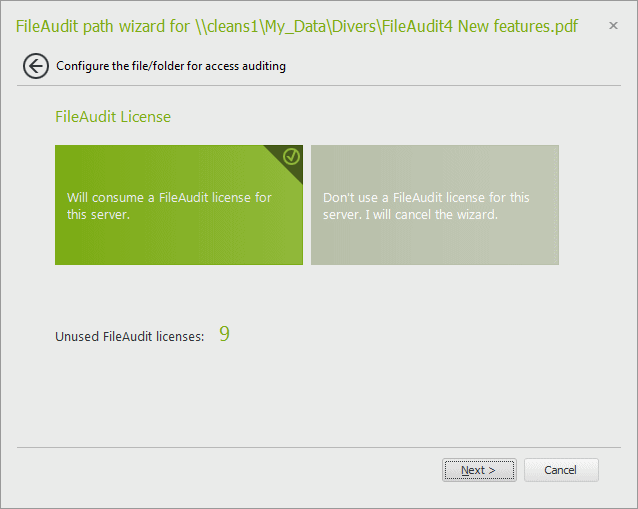
The file host will be added to the 'Licensed servers' list:
-
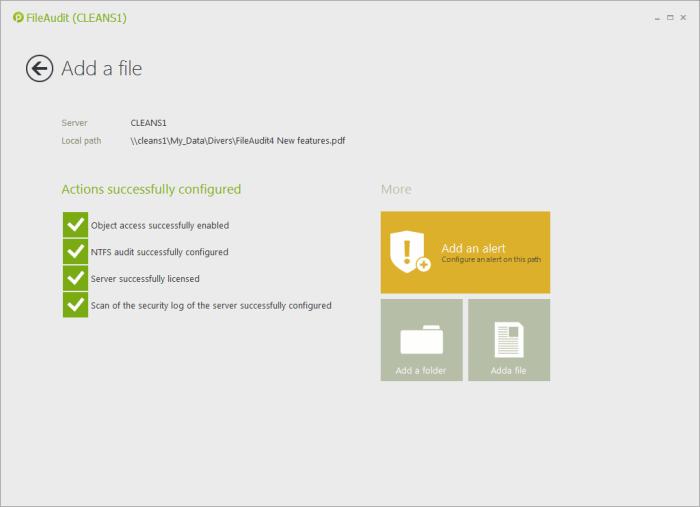
Enable the real-time event monitoring by selecting the option ‘Continually monitor the security log of this server’.
The file you have selected is now monitored by FileAudit. All access events will be stored in the default database.
-
Take note that you can directly define an alert for this file or add another folder/file path from this result view:
Automatic check
FileAudit continually checks the audit configuration status for every path entered in its different views and settings, for example in:
- the Access Reporting,
- a scheduled report configuration,
- an alert rule definition.
When a path entered is not yet configured to be audited, FileAudit will propose the configuration task be performed, via the same wizard as for the “Add a path” procedure.