8 Best Practices When Using UserLock
UserLock uniquely empowers IT to leverage the active directory logon as a critical security checkpoint. As you’re getting started with the software, take a look at these best practice tips to ensure you get the most out of UserLock.
- 1. Configure a backup server
- 2. Create a protected account for the AD Group ‘Everyone’
- 3. Restrict Domain Admins to certain machines
- 4. Configure the Web Console for continual access
- 5. Get alerted on suspicious user activity
- 6. Enable users to remotely logoff their existing sessions
- 7. Enable the alert that warns end users on the use of their own credentials
- 8. Use Computer Commands
-
Configure a backup server
As with all your IT systems, it’s a good idea to configure a backup. In the event that a server goes down it will ensure that your network continues to be protected.
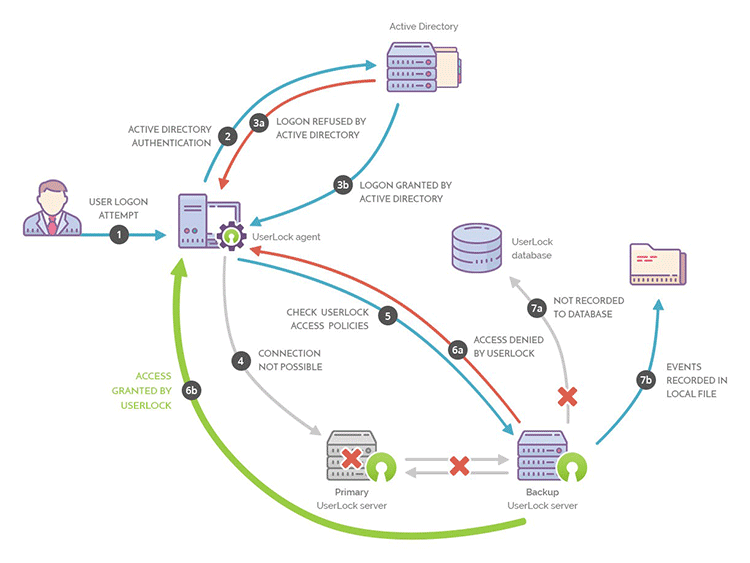
With a backup server installed, logins will continue to be monitored and protected. All events will be stored on a separate file and written to your database once the primary server is back online.
The below diagram illustrates how this works:
-
Create a protected account for the AD Group ‘Everyone’
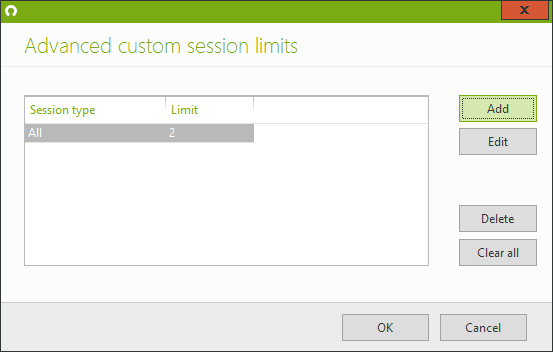
A 'Protected account' is a set of rules allowing you to define network access conditions. Using the Advanced Custom Session Limit, set up a protected account for your AD Group ‘Everyone’ that reflects your organization’s internal security policy:
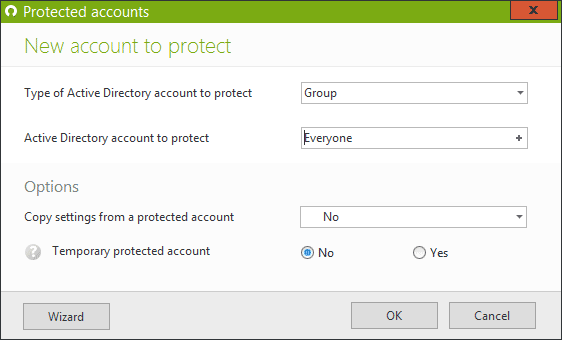
For example, if most users should be allowed a maximum of 2 open sessions, regardless of the session type, apply this setting to the protected account “Everyone”.
-
Restrict Domain Admins to certain machines
“Don’t let IT admins use their privileged user ID out there in the Wild West!”
Enforce least privilege by not allowing Domain Admins to use their credentials to troubleshoot users’ workstations. This avoids serious consequences such as the release of dormant viruses or the lateral movement from stolen credentials to access a server.
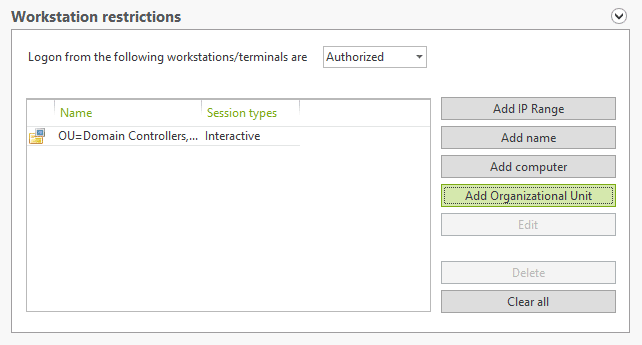
Make sure your domain admins are only connecting to the machines they need to with their privileged accounts. You can do this in UserLock with workstation restrictions:
Create a protected account for your Group “Domain Admins”
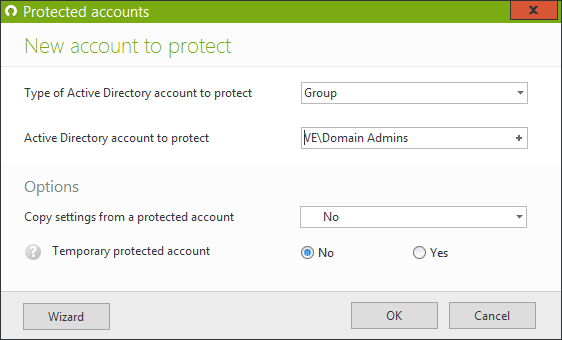
Authorize these accounts to only access domain controllers or machines that are heavily safeguarded (behind your fortress!)
You can also remind the user with a personalized message not to use this login on just any machine.
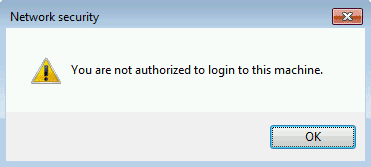
Note: The associated message is customizable in the "Messages" menu of the UserLock console.
-
Configure the Web Console for continual access
Things can happen when we are away from our desk or offsite, but we still need to react quickly. For example, blocking a user, allowing a user an extra session temporarily, extending allowed working hours, etc.
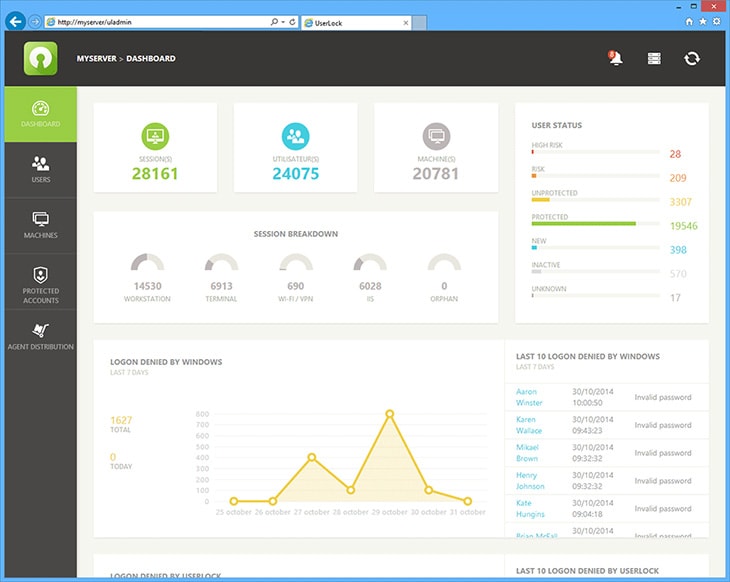
The UserLock web console allows IT to manage UserLock remotely and do everyday tasks such as logging off locked sessions remotely, or creating a temporary rule for a user.
-
Get alerted on suspicious user activity
The User Status in UserLock allows you to see when a user’s connections are not expected. Set up User Status parameters based on your internal IT policy to be alerted on abnormal or suspicious activity:
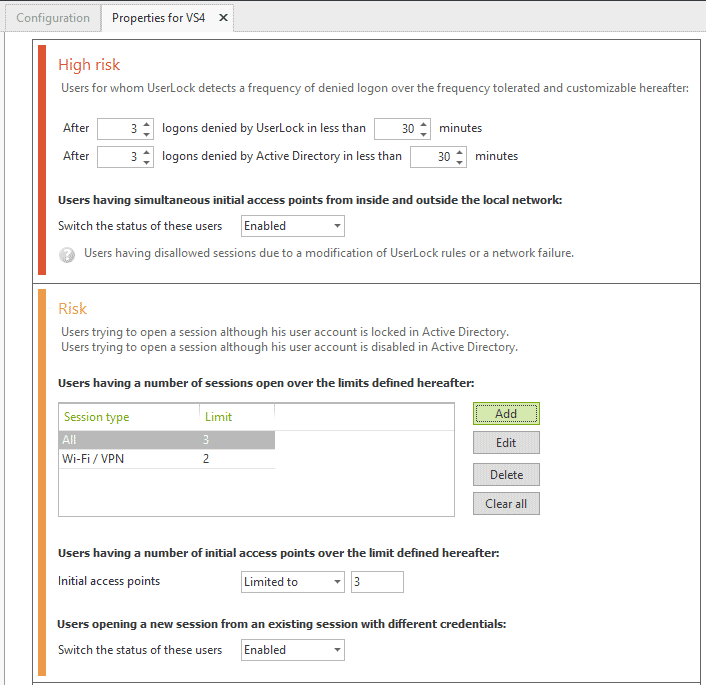
Examples of user status rules:
- The frequency of denied logon by UserLock or/and Active Directory is over the frequency tolerated.
- Two simultaneous initial access points are detected both from inside and outside the local network (i.e. the user is connected from inside and outside the network at the same time). This option is disabled by default.
- The number of initial access points open is over the customizable figure.
-
Enable users to remotely logoff their existing sessions
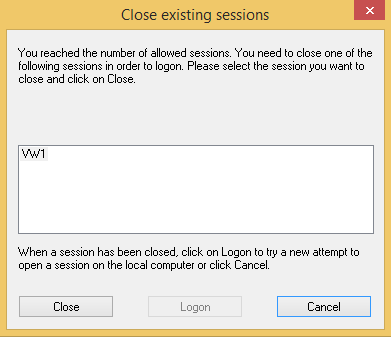
When limiting your users to a certain amount of sessions, you may be worried about an increase in helpdesk tickets from users who don’t close a session before opening a new one.
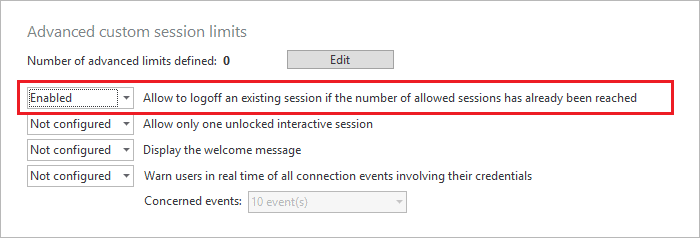
By enabling the below option in the properties of a protected account, you can prompt the user to remotely close the first open session before logging into the next one.
-
Enable the alert that warns end users on the use of their own credentials
Educating users that their credentials need to be safeguarded, and that a security breach can come from even a least-privileged account, is essential to any sound security policy.
Enable the option in UserLock to warn users in real time when their own credentials are being used. In doing so, users can react immediately by alerting IT and changing their password. At the very least, it is recommended to enable this feature for your most privileged users.
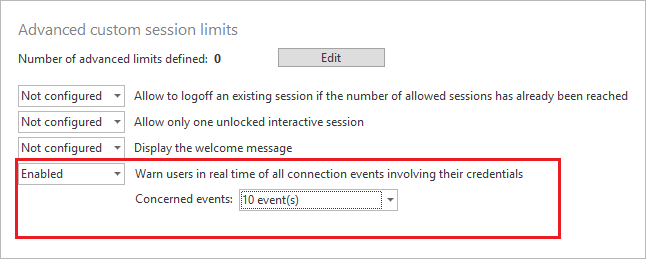
You can select which events will trigger the alert.
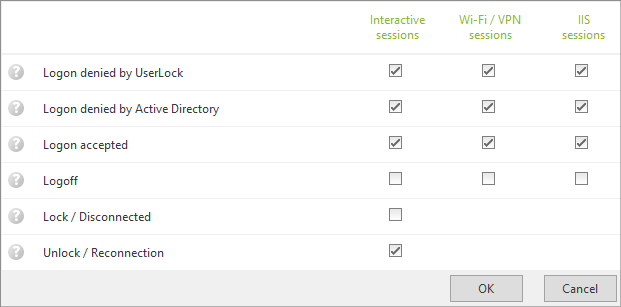
-
Use Computer Commands
UserLock allows you to launch personalized commands targeting any computers direct from the console. By default, only the 'Remote Desktop' command is already enabled. You can also enable the following ones from the computer commands menu:
- Ping
- Computer management
- Display Windows folder
- UserLock Agent error log
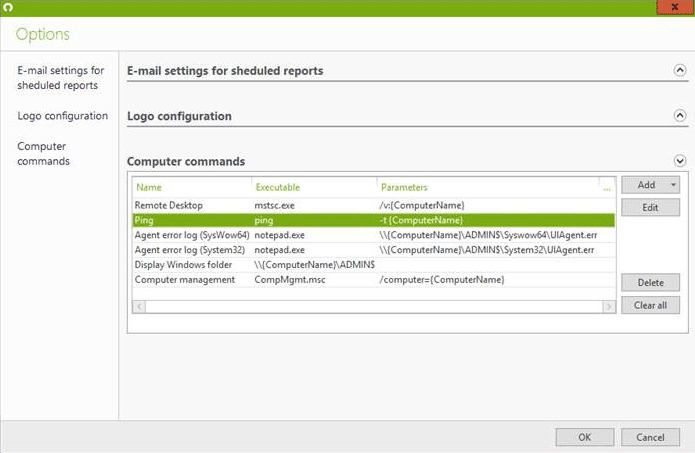
Furthermore, you can also add your own computer command.
For example, the NsLookup command:
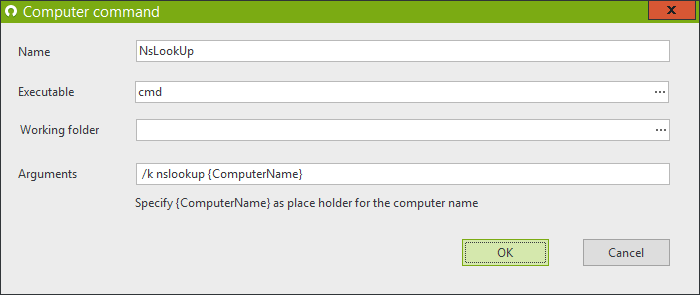
You can also use PowerShell scripts to execute computer commands.
In this example, we’ve written a PowerShell script that checks UserLock prerequisites from the UserLock server to the selected computer. You can use this to troubleshoot if you have a machine that is not able to communicate with the UserLock server. The script will check the requirements, and tell you where the issue is coming from.
Create a PowerShell script “C:\Temp\Check-UserLockPrerequisitesFromServerToComputer.ps1” and set the following content:
param ([Parameter()][string]$ComputerName)

$IsError = $false
$Cpu = Get-UserLockAgentDistribution $ComputerName
$CpuFqdn = $Cpu.Fqdn
$PingRes = Test-Connection $CpuFqdn -Quiet
if ($PingRes -eq $false)

				{
$IsError = $true
Write-Error "Ping to $CpuFqdn failed."

				}

$RemoteAdminSharePath = "\\$CpuFqdn\admin$"
$FapsRes = Test-Path $RemoteAdminSharePath

				if ($FapsRes -eq $false)

				{
$IsError = $true
Write-Error "File and Printer Sharing Access to $RemoteAdminSharePath failed."

				}

$Reg = [Microsoft.Win32.RegistryKey]::OpenRemoteBaseKey('LocalMachine', $ComputerName)
if ($Reg -eq $null)

				{
$IsError = $true
Write-Error "Access to remote registry of $ComputerName failed."

				}

$RegKey = $Reg.OpenSubKey("SOFTWARE\\Microsoft\\Windows NT\\CurrentVersion\\Winlogon")

				if ($RegKey -eq $null)

				{
$IsError = $true
Write-Error "Access to remote registry key WinLogon of $ComputerName failed."

				}


				$NetbackupVersion1 = $RegKey.GetValue("Userinit")
if (($NetbackupVersion1 -eq $null) -or ($NetbackupVersion1.Length -eq 0))

				{
$IsError = $true
Write-Error "Access to remote registry UserInit value of $ComputerName failed."

				}


				if ($IsError -eq $false)

				{
Write-Host "All prerequisites are OK for the $ComputerName computer."

				}
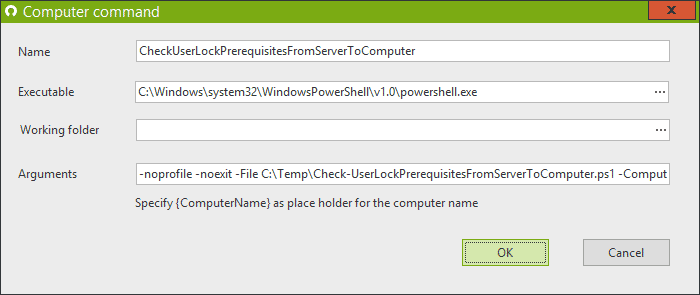
Then, in the Computer commands menu, New:
- CheckUserLockPrerequisitesFromServerToComputer
- C:\Windows\system32\WindowsPowerShell\v1.0\powershell.exe
- -noprofile -noexit -File C:\Temp\Check-UserLockPrerequisitesFromServerToComputer.ps1 -ComputerName {ComputerName}
