Set up and restrict user access to Wi-Fi sessions
This following example will give you a step by step guide on how to restrict users access to Wi-Fi sessions with UserLock, using RADIUS Authentication and RADIUS Accounting. You will also find instructions on how to configure a Cisco Aironet 1700 Wi-Fi Access Point with a preconfigured NPS Server.
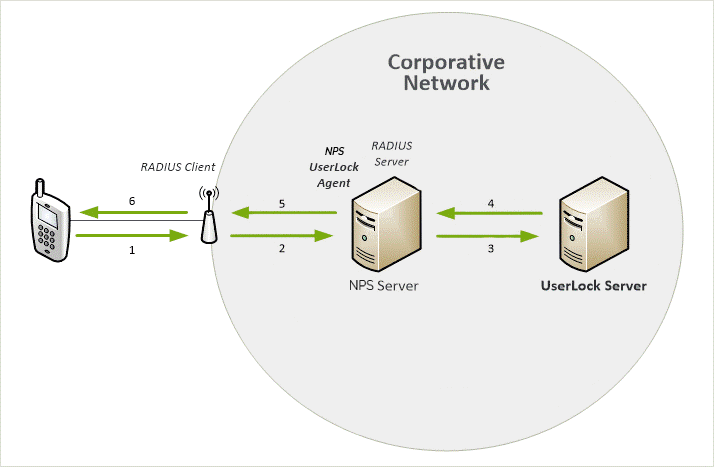
Overview Diagram
Getting Started
Conventions
Note for this example we use the following conventions:
- "NPS" refers to "Network Policy Server" (available for Windows Server 2008 and later editions) or "IAS" to talk about "Internet Authentication Service" (available for Windows Server 2003 and earlier editions).
- "NpsSrv" is the name of the NPS server.
- 192.168.1.2 is the IP of the NPS server.
- 192.168.1.3 is the IP of the Wi-Fi Access Point.
Requirements
- A Wi-Fi Access Point compatible and configured with RADIUS Authentication and RADIUS Accounting. An example of such a device is Cisco Aironet 1700 which will be used in this document.
- If RADIUS Accounting is not configured, UserLock will not receive logoff notifications, so its data will be incomplete. That's why all instances of RADIUS Accounting are in bold.
- A Network Policy Server (NPS).
Notes
RADIUS (Remote Authentication Dial-In User Service) is a protocol for authentication and accounting. RADIUS Authentication and RADIUS Accounting are two different things, and both are needed to be compatible with UserLock. Usually, RADIUS Authentication is on port 1812 or 1645, and RADIUS Accounting is on port 1813 or 1646.
NPS is the Microsoft implementation of RADIUS from Windows Server 2008. It is the successor of IAS used in editions up to Windows Server 2003.
Wi-Fi is a standard for wireless communications. It is possible to configure RADIUS for Wi-Fi depending on access points. RADIUS Authentication and Accounting are required for UserLock to manage Wi-Fi sessions.
Currently, it is not possible to log off Wi-Fi (and VPN) sessions with UserLock. It is only possible with Interactive (desktop) and IIS sessions.
How to configure the Access Point (AP)
Configure a new Virtual LAN
-
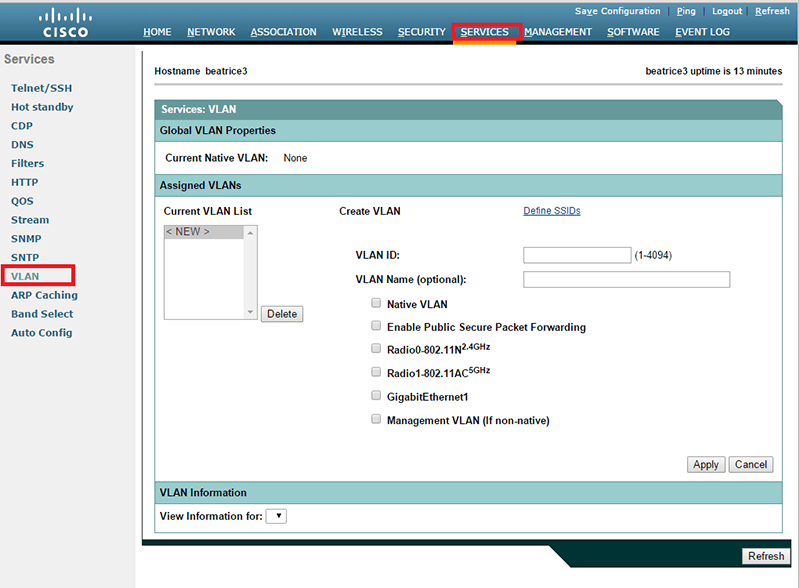
Open the web Administration console of the Wi-Fi Access Point.
-
Go to "SERVICES"/"VLAN"
-
To configure VLAND ID, select "Native VLAN", "Radio0-802.11N2.4GHZ" and "Radio0-802.11N5HZ" options.
Click on "Apply"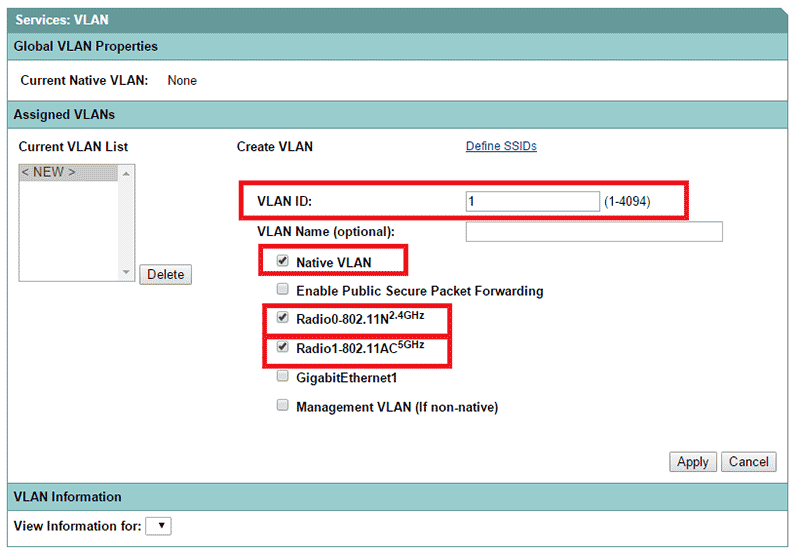
Configure the NPS server
-
If no certificate was created with the server, create one (see https://www.youtube.com/watch?v=lNQd1Nj1bn8).
In some cases (for example, just after adding the NPS role to the server), it is necessary to reset the NPS configuration to the default one. To do that :
- Back up "C:\Windows\System32\ias\ias.xml" and "C:\Windows\System32\ias\iasTemplates.xml".
- Run the following commands:"
- NET STOP IAS
- Del C:\Windows\System32\ias\ias.xml
- Del C:\Windows\System32\ias\iasTemplates.xml
- NET START IAS
-
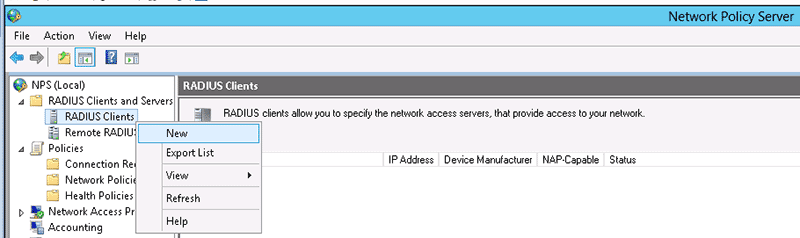
In the configuration section of the NPS server, add the Wi-Fi access point as a RADIUS client by making a right click on 'Radius Clients' and select New.
-
To enable the radius Client, type a Name for this Radius Client, input the IP address of the Access Point and finally type a shared key or let it generate one.
Click on OK to validate.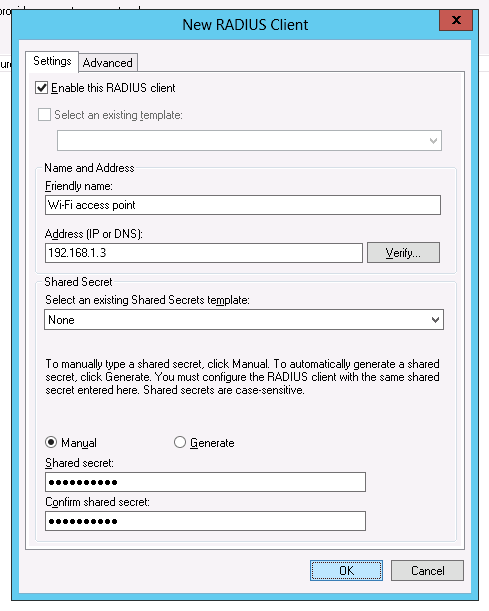
-
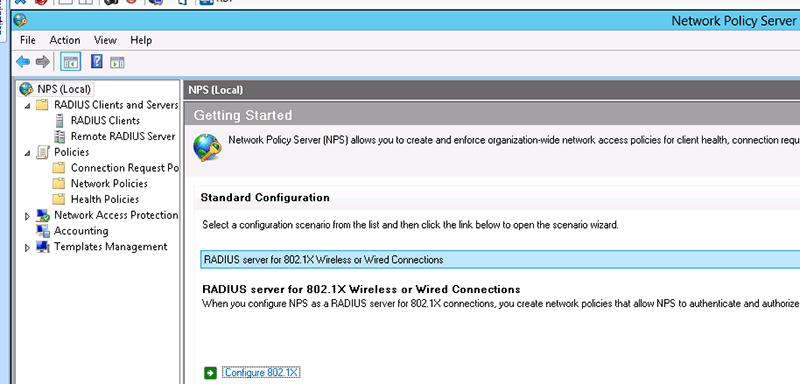
Select Radius server and click on "Configure 802.1X"
-
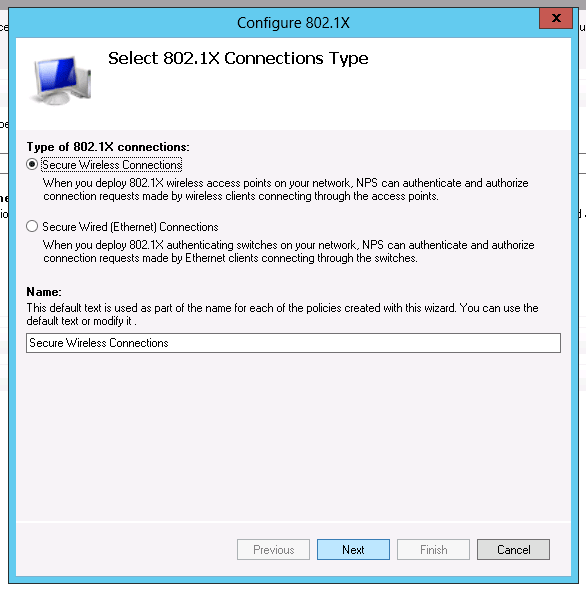
Select Secure Wireless Connections, type a new name or leave the default connection name and click on Next.
-
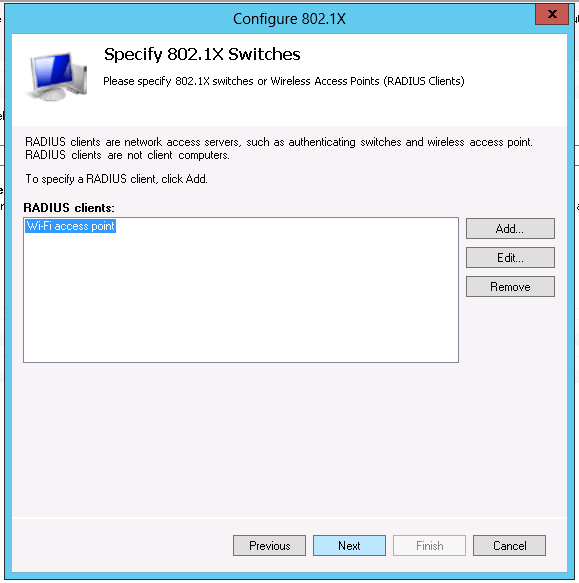
Leave by default and click on next.
-
Select "Microsoft Protected EAP (PEAP)" in the dropdown list
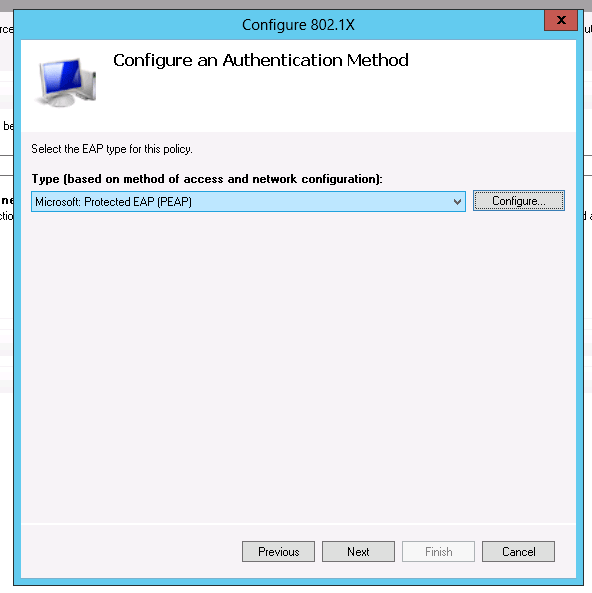
Click on "Configure..." -
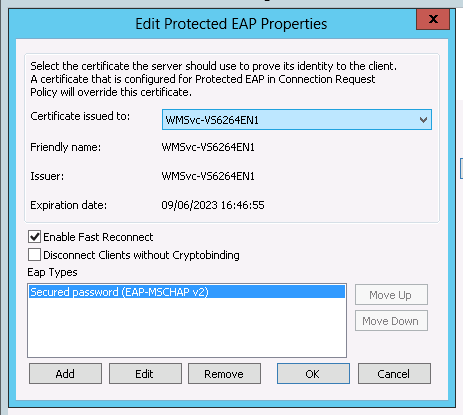
The certificate will be automatically detected (cf requirements), press OK to validate.
-
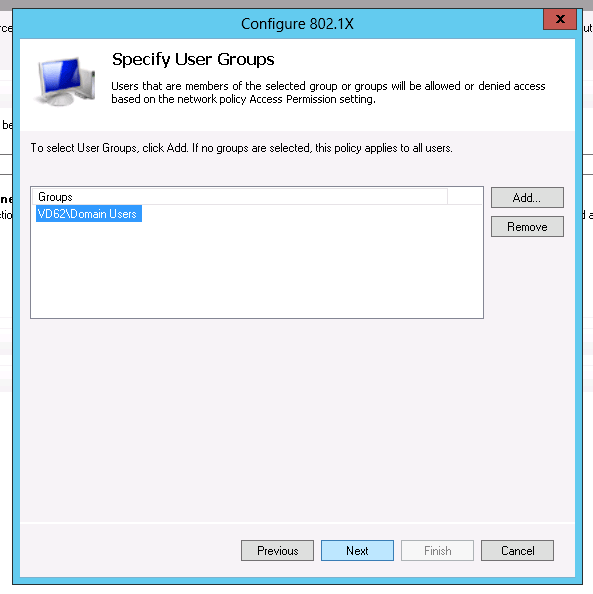
Click on "Add" to define for which users you want to manage WI-FI access and click on "Next"
-
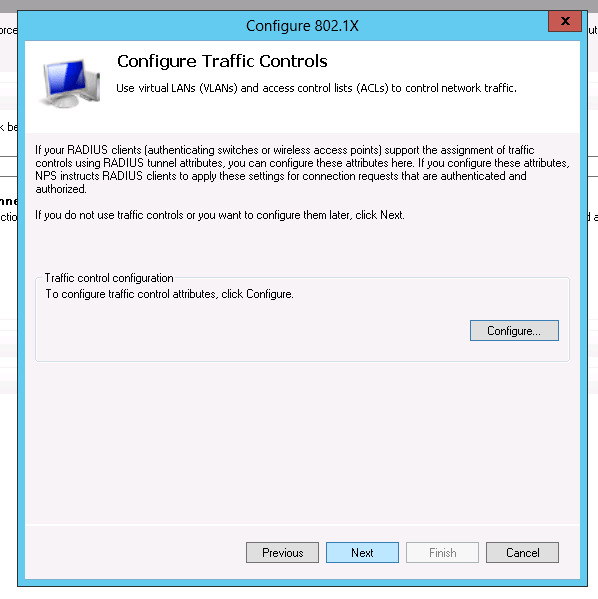
Just click on "next"
-
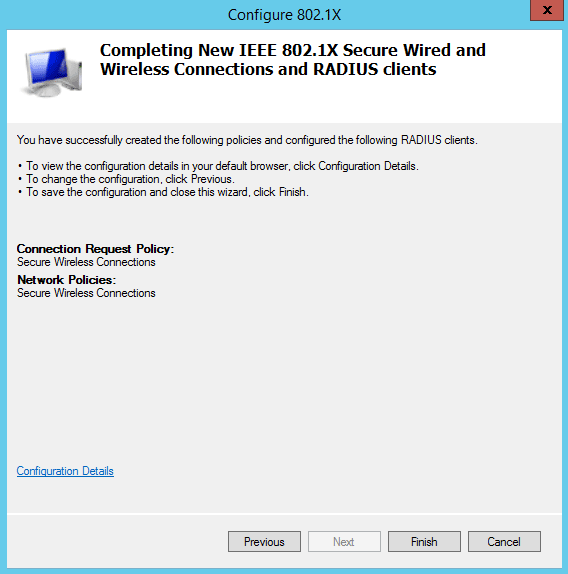
Click on "Finish" to terminate the NPS configuration
Configure RADIUS server settings on the Access Point
-
Open the web Administration console of the Wi-Fi Access Point.
-
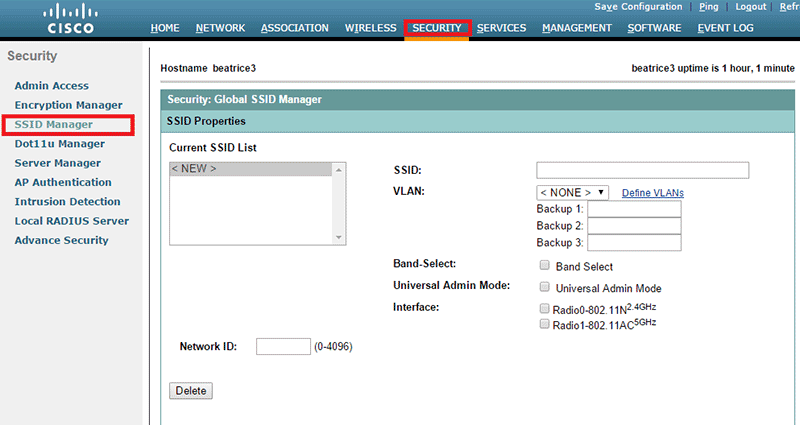
Go to "SECURITY" / "SSID Manager":
-
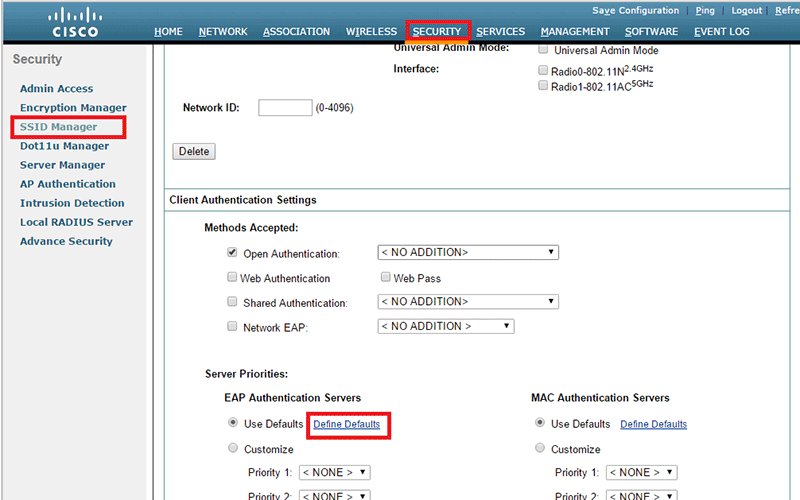
Under "Client Authentication Settings /Server Priorities", click on "Define Defaults".
-
Then configure RADIUS Server with your NPS server's parameters and click on "Apply" (you can configure multiple servers and then select a priority between them):

Configure SSID and publish
-
Go to "SECURITY/SSID Manager"
-
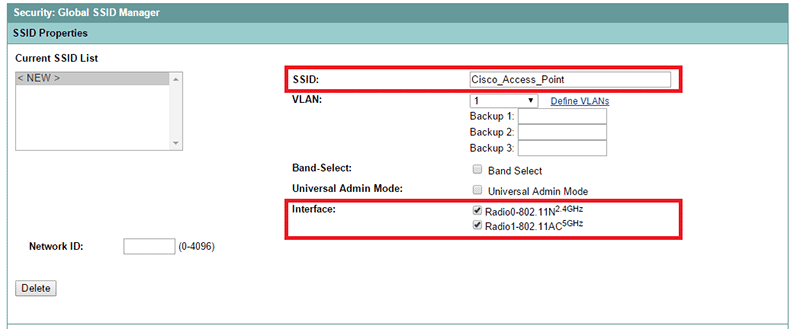
Type a SSID name, select VLAN 1, check the boxes for both radio interface.
-
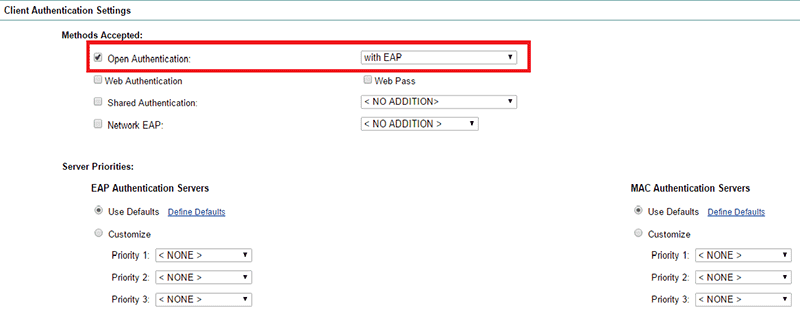
Under "Client Authentication Settings" Select "Open Authentication" with EAP:
-
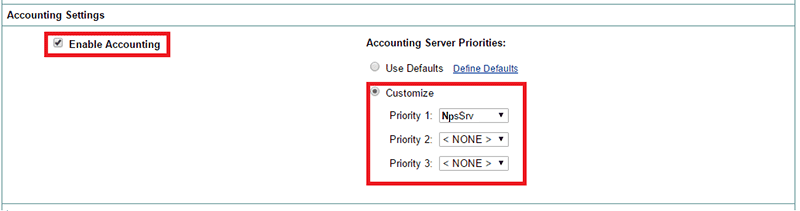
Under "Accounting Settings" select "Enable Accounting". And on "Accounting Server Priorities" select your RADIUS server/s:
-
Under "Multiple BSSID Beacon Settings" select "Set SSID as Guest Mode" option:
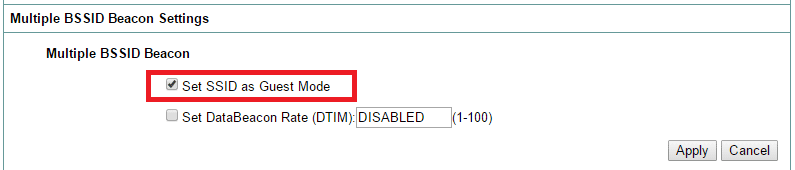
Click on "Apply". -
Under "Guest Mode/Infrastructure SSID Settings", select "Single BSSID" and select previous configured SSID:
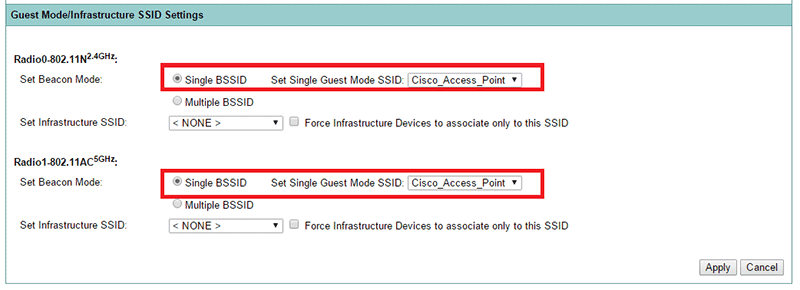
Click on "Apply".
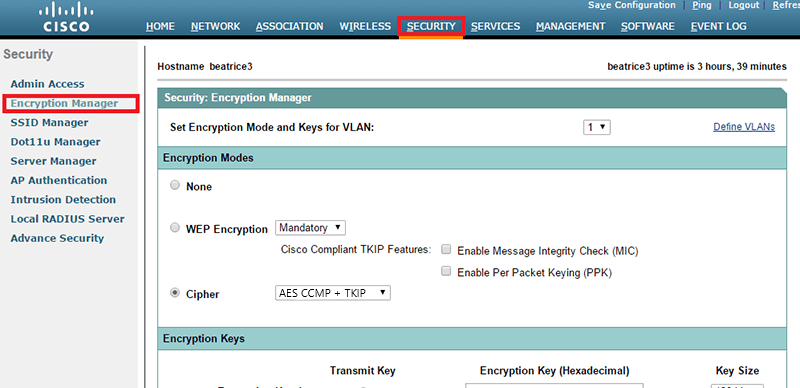
Configure Wi-Fi Encryption
-
Open "Security / Encryption Manager". On "Encryption Modes" select "Cipher" and "WEP 128 bit". And click on "Apply":
-
Go to "SECURITY"/"SSID Manager". Select previously configured SSID from list and under "Client Authenticated Key Management", Configure "Key Management" as "Mandatory" and select "Enable WPA" selecting "WPAv2":

-
If you want to protect Wi-Fi sessions on laptop computers, configure these computers with the User Wi-Fi Authentication as follows:
In the properties of the Wi-Fi network adapter of all laptops to protect (you can use a GPO to change them all at once), choose the Authentication mode "User". Note that if you choose "Computer", UserLock will not protect Wi-Fi sessions because they will be opened as sessions of the computer, not the user.
Configure your devices so that the Wi-Fi connections are:- Connected before Windows logons.
- Disconnected after Windows logoffs.
Connect to Wi-Fi
-
Check the Wi-Fi connections in the interface of the Wi-Fi access Point:
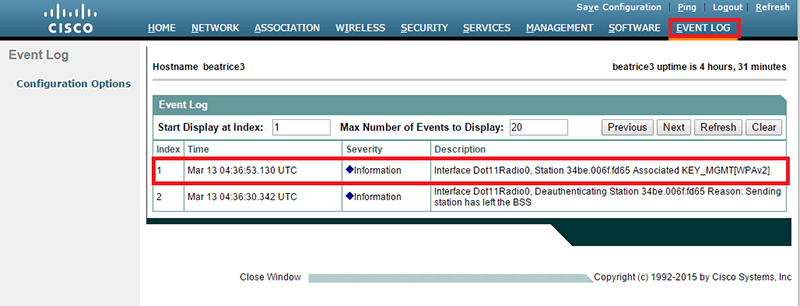
-
Open Cisco AP and go to "EVENT LOG":
Restrict all users to 1 Wi-Fi Session
-
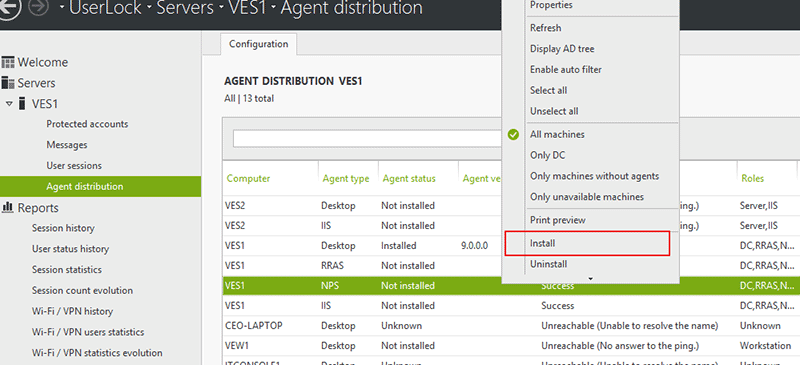
From the UserLock console, deploy the NPS agent on the NPS server:
-
Under the NPS server, run CMD (or PowerShell) as administrator and run the following commands (caution: it will disconnect all Wi-Fi connections active at that moment):
- net stop remoteaccess
- net stop ias
- net start ias
- net start remoteaccess
-
From the UserLock Console, check that the status of the NPS agent is "Installed"

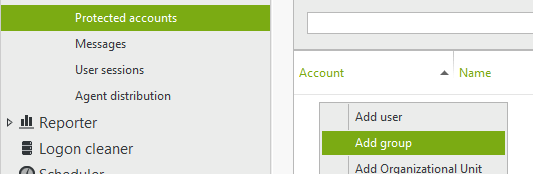
-
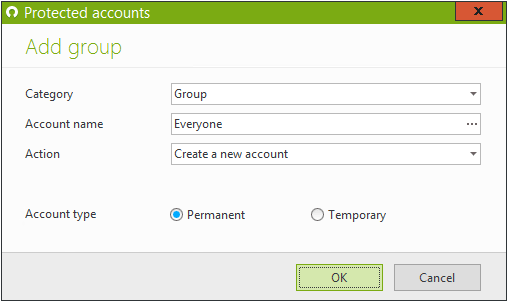
Create a protected account called "Everyone" to apply this new rule to all users.
-
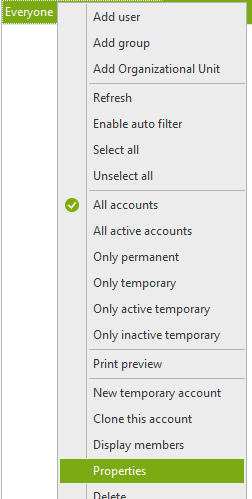
Configure the "Everyone" protected account to restrict each user to 1 Wi-Fi session

Allow 1 Wi-Fi / VPN session
Testing the UserLock restrictions
-
Make a Wi-Fi connection with one account (in this example the account "Alice"). The connection is successful. You can see the session in the UserLock console.

-
Now try opening a second Wi-Fi connection with Alice, it will be denied.
Other restrictions are also possible for Wi-Fi sessions: For example by defining working hours, time quotas...
To learn more about all the rules allowing you to define network access conditions, please see the "Protected accounts" help section.