IIS agent configuration
The additional configurations to perform in 'IIS Manager' in order to enable the UserLock 'IIS agent' will depend on the agent base technology:
Configuration of UserLock 'IIS agent' using HTTP Module technology
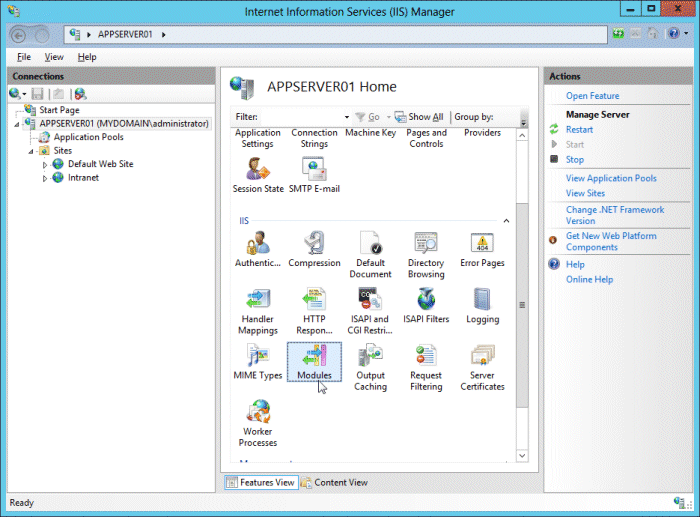
For an agent using the HTTP Module technology, once the agent has been deployed, you need to configure the Web application 'Modules' settings on the target server in 'IIS Manager':
-
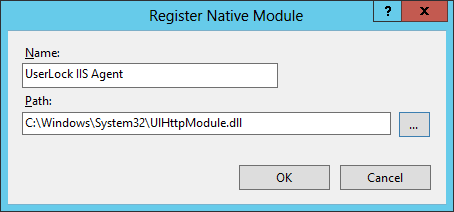
Select the IIS server in the menu tree and open the 'Modules' section.
-
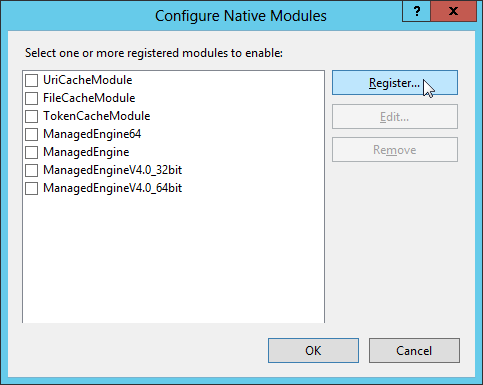
Specify the path to the UserLock HTTP Module 'IIS agent'. By default the HTTP Module 'IIS agent' is deployed into the 'system32' (64-bit) or 'syswow64' (32-bit) folder of the IIS server, except if you have manually installed it through the file copy procedure. Click on 'OK'.
-
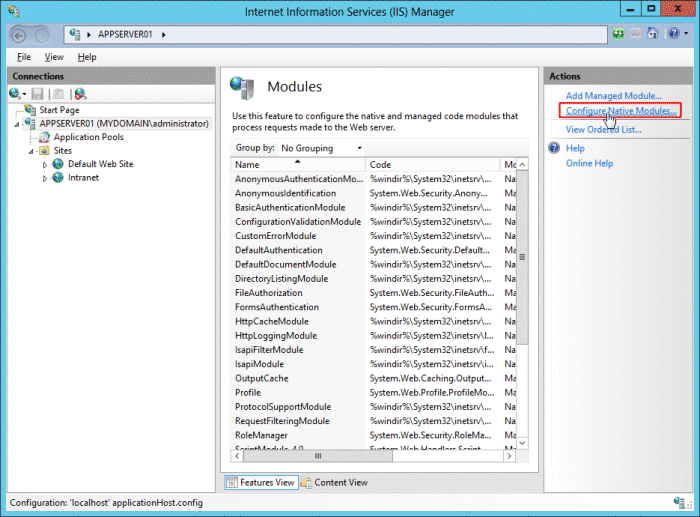
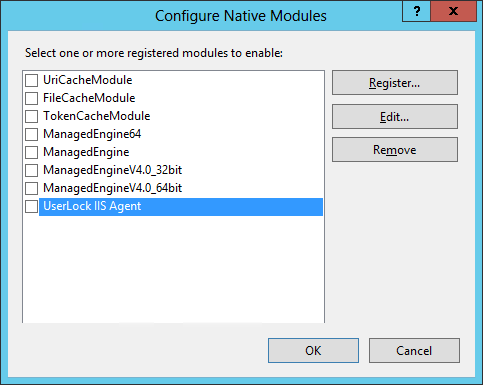
Clicking on 'OK' automatically adds and selects the module in the native module list of the IIS server. If you leave it selected and validate it by clicking on 'OK', the UserLock HTTP Module agent will be enabled for all IIS Web applications on this IIS server. We do not recommend this. This technology allows you to directly to target the Web application you want to supervise and control with UserLock.
Uncheck the UserLock 'IIS agent' line and click on 'OK'.
-
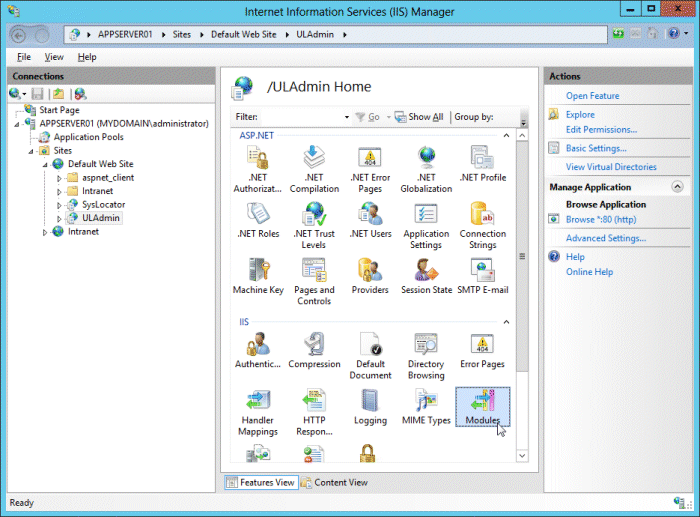
Select the target Web application to protect in the left pane of 'IIS Manager' and as previously, open the 'Modules' section.
-
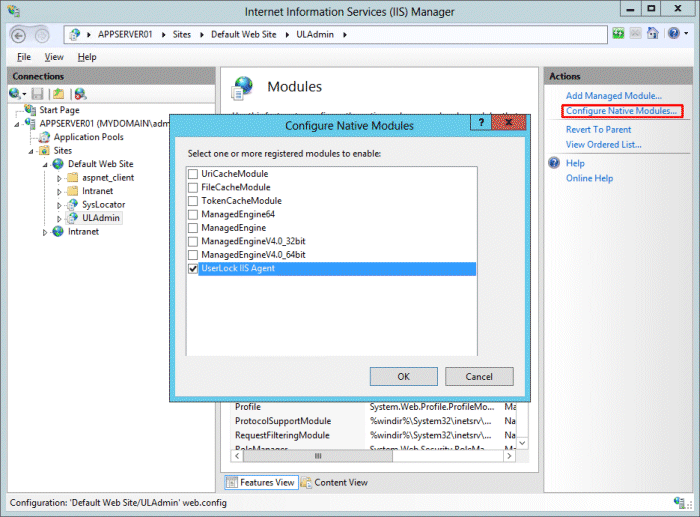
Click on 'Configure Native Modules...' in the 'Actions' panel to the right. The 'Configure Native Module' wizard will open.
As we have previously added the UserLock 'IIS agent', it's now listed. Check its corresponding box and click on 'OK' to enable it for just this Web application.
Configuration of UserLock 'IIS agent' using ISAPI filter technology
For an agent using the ISAPI filter technology, once the agent has been deployed, you need to configure the website 'ISAPI Filters' settings on the target server in 'IIS Manager'. Depending on the server operating system version, you can set it as follows:
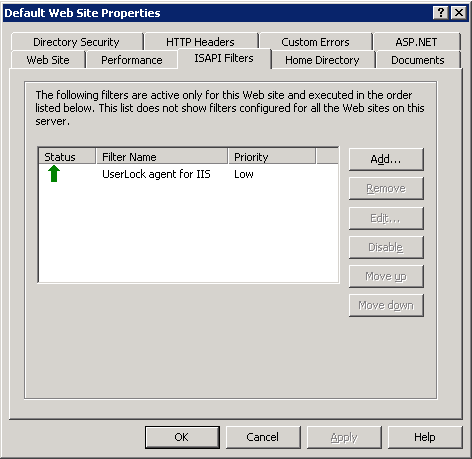
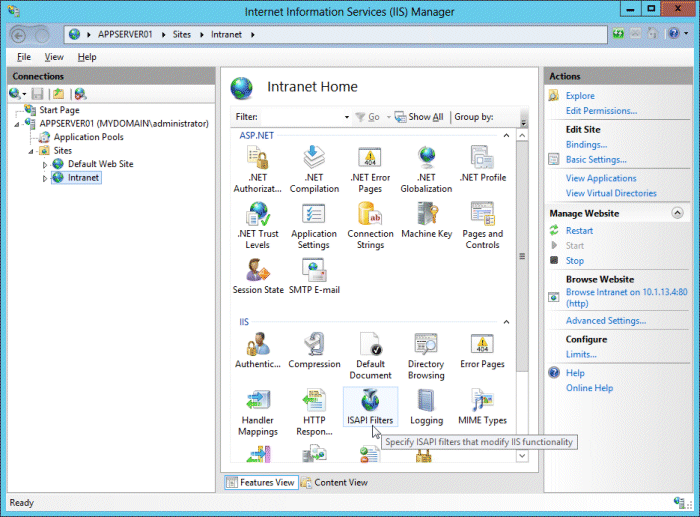
- Select the target website
in the menu tree.
- In the central window, double-click on the 'ISAPI Filters' icon.
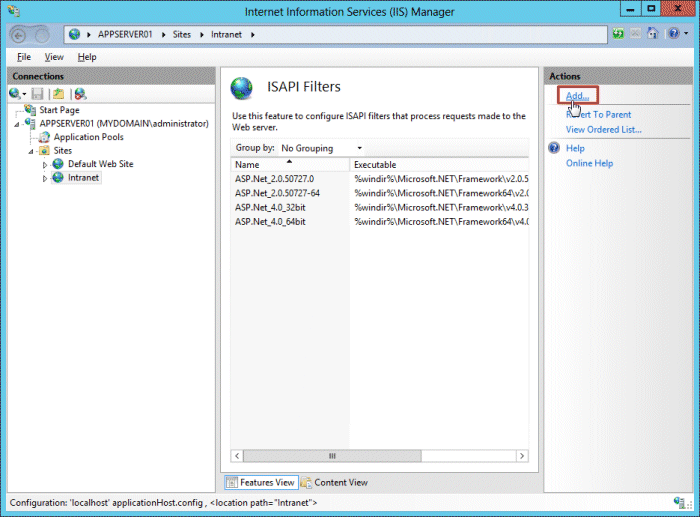
- In the 'Actions' panel, click on 'Add…'.
- Choose a name for the UserLock filter and browse to the UserLock 'IIS agent': 'C:\WINDOWS\system32\IisSessions.dll' (64-bit) or 'C:\WINDOWS\syswow64\IisSessions.dll' (32-bit).
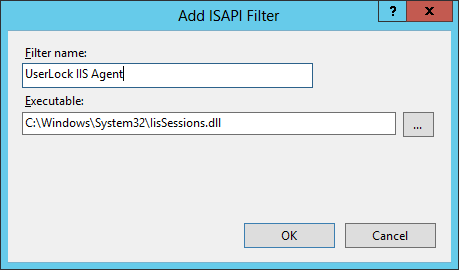
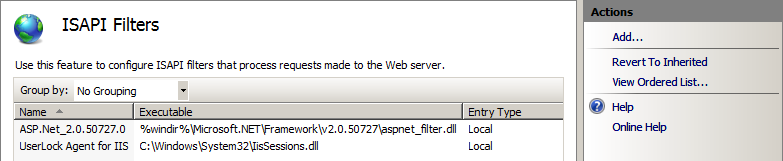
- Click on 'OK'. The UserLock 'IIS agent' will be added to the list.
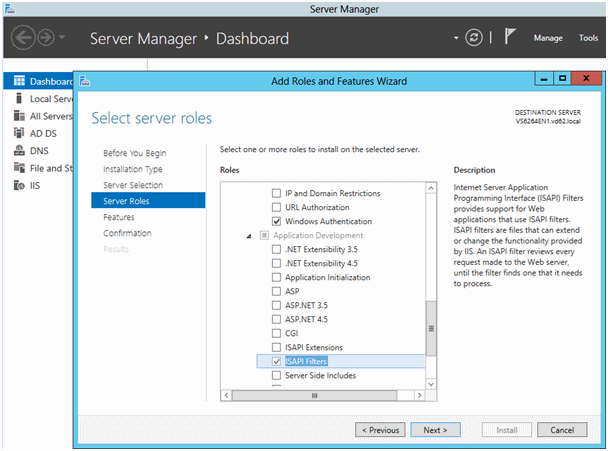
Please note: The ISAPI filters feature is not installed by default on Windows Server 2012. You need to add it through the 'Add Roles and Features Wizard'.
- Display the 'Properties' of the target
website by right-clicking in the menu tree.
- In the ISAPI filters tab, click on the 'Add…' button.
- Choose a name for the UserLock filter and browse to the UserLock 'IIS
agent':
C:\WINDOWS\system32\IisSessions.dll' (64-bits) or 'C:\WINDOWS\syswow64\IisSessions.dll'
(32-bits).

- Click on 'OK'. The UserLock 'IIS agent' will be added to the ISAPI filters list. Make sure that it will be called last by moving its position down if several ISAPI filters are already defined.